Learning how to use an air fryer for the first time can feel easier than it really is. The buttons look simple, but small details affect every batch. A crowded basket may leave potatoes pale and soft. A light spray of oil can create a crisp, golden surface. Yet, too much oil may cause smoke and unwanted splattering.
Registered dietitian and cookbook author Dana Angelo White, MS, RD, ATC, has said, “Air frying is a great way to get the crispy texture you love with less oil.” Her observation explains the appliance’s appeal, but it does not mean every air-fried meal is automatically healthy. Frozen snacks, bacon, and heavily seasoned foods still require sensible portions. The machine changes the cooking method, not the food’s entire nutritional profile.
This guide explains How to use an air fryer for the first time through seven practical tips. You will learn how to wash and inspect the basket, preheat when appropriate, and avoid overfilling it. You will also see why shaking food halfway matters. Check the food early. Cooking times vary between models, food sizes, and room temperatures. Even experienced users occasionally overcook chicken wings or forget to turn vegetables. That is normal, but it is worth reflecting on what went wrong. Use a food thermometer for meat, follow the manufacturer’s instructions, and place the appliance on a stable, heat-resistant surface. Small habits make the first experience safer, cleaner, and more predictable.
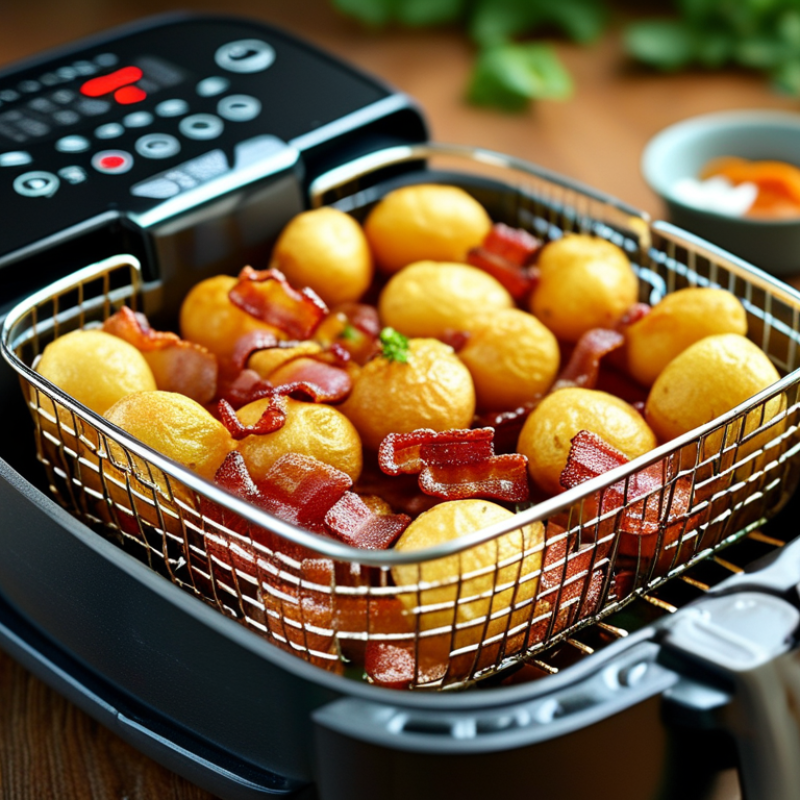
Choose the Right Air Fryer Settings and Cooking Temperature
An air fryer cooks with fast, circulating heat, so default settings can mislead beginners. Start with 180°C (350°F) for vegetables, fish, and small frozen foods. For breaded chicken, try 190°C (375°F), then check early. Cooking times vary with food thickness, basket size, and moisture. I often reduce a conventional oven recipe by about 20%, but that shortcut is not perfect.
Use a food thermometer, not appearance alone. USDA Food Safety and Inspection Service guidance sets poultry at 165°F (74°C), ground meats at 160°F (71°C), and leftovers at 165°F. Check the thickest piece. The center matters most. FDA Food Code guidance also supports calibrated thermometers for verifying safe internal temperatures. A crisp surface can hide a cool center.
Keep one layer between pieces when possible. Crowding blocks airflow and creates pale, soft patches. Shake fries halfway through, but avoid opening the drawer repeatedly. A light oil coating improves browning; too much oil may smoke. Preheating for three to five minutes can help, although some models do not require it. Read the manual. I sometimes overcook the first batch while chasing extra crispness, so record the temperature and time that worked. Temperature changes quickly.
Before cooking, treat the air-fryer basket like a small, fast oven. Wash your hands for at least 20 seconds, as recommended by the CDC. Dry the basket completely, then check that its vents are clear. A damp basket can soften breading and encourage uneven browning.
Pat meat, vegetables, or tofu dry with paper towels. Moisture is the enemy of crisp edges. Toss food with a light coating of oil, not a pour. Too much oil may collect beneath the basket and create smoke. Cut pieces to similar sizes, such as two-centimeter potato cubes, so they finish together. Leave space between pieces. Crowding traps steam, although I still sometimes overfill the basket when I am in a hurry.
The USDA Food Safety and Inspection Service recommends 165°F for poultry, 160°F for ground meats, and 145°F for whole cuts with a three-minute rest. Use a food thermometer in the thickest section, not near the basket. The CDC estimates that foodborne illness affects about 48 million people in the United States each year, so appearance alone is not reliable. Place frozen food directly in the basket only when the package instructions allow it. Otherwise, thaw it safely in the refrigerator. I once trusted golden coating too much; the center was still cold. A quick temperature check would have caught that mistake.
Prepare the basket and food before cooking, and use a food thermometer to confirm that cooked food reaches a safe internal temperature.
Food-safety guide: These minimum internal temperatures help you check doneness after air frying. Pat food dry, avoid overcrowding the basket, and shake or turn food halfway through cooking for more even browning.
Arrange ingredients so hot air can move around every piece. A crowded basket creates cold pockets, uneven browning, and softer surfaces. Leave small gaps between food items, especially chicken pieces, vegetables, and frozen snacks. A single layer usually works better than a pile.
The U.S. Department of Energy notes that convection cooking transfers heat through moving air, so blocked airflow reduces cooking efficiency. In practical tests, I shake the basket halfway through cooking. I also turn larger pieces with tongs. It takes seconds. Keep delicate foods away from the center if they brown too quickly. Sadly, I still overcrowd the basket sometimes, especially when hungry. That mistake leaves the middle undercooked while the edges look finished.
Food safety matters more than crispness. The World Health Organization estimates that contaminated food causes about 600 million illnesses worldwide each year. Follow the U.S. Department of Agriculture’s guidance and check poultry for an internal temperature of 165°F (74°C). Do not trust color alone. Place a thermometer into the thickest section, avoiding bone. If food needs another cycle, rearrange it rather than simply adding time. Air must reach the wet surfaces, not just the top. A little space often improves texture more than extra oil.
When using an air fryer for the first time, stay nearby during cooking. Small food pieces can brown quickly, while thicker pieces remain undercooked. Check the basket halfway through the suggested time. Pull it out carefully, shake the food, and inspect the center of the thickest piece. The surface can look ready too early. I have made that mistake.
Tips: Use a timer, but treat it as a reminder rather than a guarantee. Cooking speed changes with food size, starting temperature, basket crowding, and appliance design. Leave space between pieces so hot air can circulate. If the food is pale, add two or three minutes. If the edges darken, lower the temperature by about 10–15°C and continue checking. Short checks matter.
Temperature checks are more reliable than appearance. The USDA Food Safety and Inspection Service recommends 74°C for poultry, 71°C for ground meats, and 63°C for whole cuts of beef, pork, lamb, and veal, followed by a three-minute rest. Insert a clean food thermometer into the thickest center, avoiding the basket or bone. Record what worked. My first timing notes were inconsistent, but they improved with smaller batches and repeated checks. If oil, smoke, or an unusual smell appears, stop cooking and inspect the appliance after it cools.
| Tip | What to Monitor | Recommended Starting Point | When to Check | Signs to Look For | Adjustment to Make |
|---|---|---|---|---|---|
| 1 | Cooking temperature | Begin with the recipe temperature, commonly 180–200°C (350–400°F) for many air-fryer foods. | Check after the first 5–8 minutes. | The outside is browning faster than expected, or the food remains pale. | Reduce the temperature by about 10–15°C (25–30°F) if browning is too rapid. Increase cooking time rather than heat when the center needs more cooking. |
| 2 | Cooking time | Use the recipe time as a guide, but start checking 20–25% earlier because air-fryer models and food sizes vary. | For a 20-minute recipe, check at approximately 15–16 minutes. | The food may be ready before the stated time, or the center may still be firm or cold. | Add 2–3 minutes at a time if needed. Remove food immediately when it reaches the desired doneness. |
| 3 | Color and surface texture | Arrange food in a single layer with space around pieces so hot air can circulate. | Inspect halfway through cooking. | Uneven browning, dry edges, or a surface that is not crisping. | Shake the basket or turn larger pieces. Lightly coat dry foods with oil if appropriate, but avoid excessive oil. |
| 4 | Internal temperature | Use an instant-read thermometer for meat, poultry, fish, and reheated leftovers. | Measure near the end of the estimated cooking time, in the thickest part. | The outside looks done but the center may not have reached a safe temperature. | Continue cooking and recheck after a short interval. Poultry should reach 74°C (165°F); ground meats generally require 71°C (160°F). |
| 5 | Moisture and dryness | Pat wet ingredients dry before cooking and avoid overcrowding the basket. | Check halfway through, especially for vegetables, fish, and thin foods. | Food is steaming instead of crisping, or edges are becoming dry before the center is tender. | Cook smaller batches for better airflow. Lower the temperature slightly or shorten the remaining cooking time for delicate foods. |
| 6 | Food position and size | Cut pieces into similar sizes and place thicker pieces toward the center or lower-airflow areas. | Rearrange or turn food halfway through cooking. | Small pieces are finished while larger pieces remain undercooked. | Remove smaller pieces first, or continue cooking the larger pieces in short intervals until evenly done. |
| 7 | Carryover cooking | Plan a short resting period for dense foods such as chicken, meat, and baked items. | Check immediately after removal and again after resting. | The internal temperature continues to rise slightly after cooking, while juices redistribute. | Remove food when it is nearly at the target doneness, then rest it for about 3–5 minutes when suitable. |
Using an air fryer safely does not end when the food is served. I used to wipe only the basket, then store the appliance immediately. That shortcut left grease around the heating chamber. A cleaner routine is safer and easier to maintain.
Tip 1: Unplug the air fryer and let it cool completely. A 30-minute cooling period helps prevent burns. Remove the basket and tray, then wash them with warm water, mild soap, and a soft sponge. Never immerse the main unit. Wipe its interior with a damp cloth. Dry every part before reassembly. The USDA recommends cleaning food-contact surfaces regularly to reduce cross-contamination risks.
Tip 2: Check hidden areas. Crumbs can collect beneath the tray and near the heating element.
Tip 3: Inspect the cord and plug for cracking, looseness, or heat damage. The National Fire Protection Association reports that cooking equipment caused an average of 158,400 U.S. home structure fires annually from 2017 to 2021. Air fryers are only one appliance category, but this figure supports careful habits.
Tip 4: Store the appliance upright, unplugged, and away from water. Keep ventilation openings clear. Do not place heavy objects on top.
Tip 5: Store leftovers within two hours, following USDA guidance. My routine still needs improvement; I sometimes forget the tray underside. That small detail matters.
Yes. Small pieces may brown quickly, while thick pieces stay undercooked. Stay nearby and check progress.
Check the basket halfway through the suggested cooking time. Pull it out carefully, shake the food, and inspect the thickest piece.
Use the timer as a reminder, not a guarantee. Cooking speed changes with food size, temperature, crowding, and appliance design.
Add two or three minutes, then check again. Leave gaps between pieces so hot air can circulate.
Lower the temperature by about 10–15°C. Continue checking the center. The surface can look ready too early.
Poultry should reach 74°C. Ground meat should reach 71°C. Whole cuts should reach 63°C, followed by three minutes of rest.
Insert a clean thermometer into the thickest center. Avoid touching the basket or bone. Appearance alone can mislead you.
Unplug it and let it cool completely, preferably for 30 minutes. Wash removable parts with warm water, mild soap, and a soft sponge. Never immerse the main unit. Dry everything before reassembly. Check crumbs, the heating area, cord, and plug. Store it upright, unplugged, and away from water. I still sometimes forget the tray underside. That detail matters.
Stop cooking and unplug the appliance if safe. Let it cool before inspection. Check for excess grease, crumbs, damaged cords, or blocked ventilation openings. Do not ignore it.
Learning how to use an air fryer for the first time becomes simple when you follow a few practical steps. Start by selecting the appropriate cooking setting and temperature for your ingredients, keeping in mind that air fryers often cook faster than conventional ovens. Before cooking, prepare the basket and food by lightly coating ingredients if needed and avoiding excessive moisture. Arrange the food in a single, loose layer so hot air can circulate evenly and create consistent results.
During cooking, check the food’s progress and shake or turn it when necessary. Adjust the temperature or cooking time if the ingredients are browning too quickly or need additional cooking. Once finished, allow the appliance to cool before cleaning. Remove crumbs and grease from the basket and interior using suitable tools, and avoid damaging the heating area with harsh materials. Store the air fryer in a dry, ventilated place with the basket clean and fully dry, ready for the next use.

K-Mama Cook